Accessing Orthanc from the file explorer using WebDAV
Contents
Since release 1.8.0, the content of an Orthanc server can be mapped/mounted as a network share thanks to WebDAV. Thanks to this feature, you can easily browse the DICOM instances that are stored by Orthanc using the built-in file explorer of your operating system. It is possible to download, upload or delete DICOM instances as well.
Orthanc creates a so-called virtual filesystem that indexes the same DICOM resources according to different views (data can be accessed by patients, by studies, by date, or by DICOM UIDs).
Screenshots
The screenshots below are generated using the test virtual machines that are provided by Microsoft.
Here is the layout of the WebDAV server of Orthanc 1.8.0:
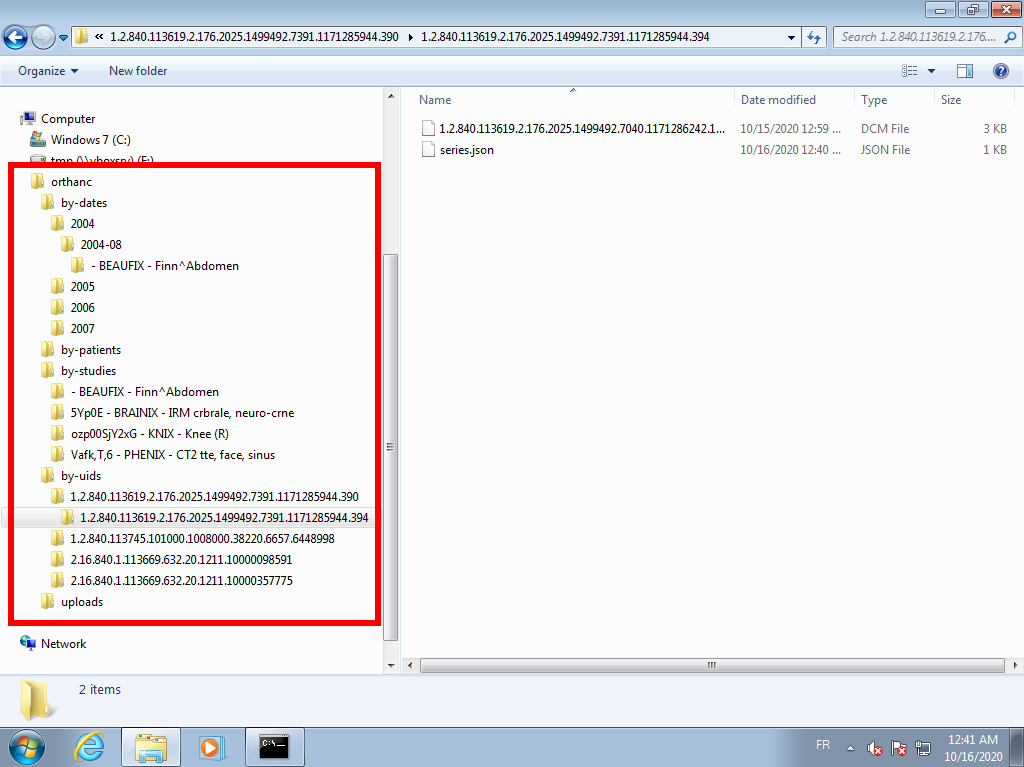
As can be noticed, Orthanc exposes a full hierarchy of DICOM resources. These resources are transparently mapped to the database of Orthanc. The same resource will appear at multiple locations of this virtual filesystem, but in practice, it is stored only once. One can choose the best way to access the information depending on the use case.
Uploading a full folder containing a DICOM study (such as a CD or a
DVD containing a DICOMDIR) is as simple as a drag-and-drop onto the
/uploads/ folder:

As soon as the DICOM files have been dragged-and-dropped, they are
progressively ingested by Orthanc. Once a DICOM file has been
ingested, it is automatically removed from the /uploads/ folder.
Note that it is not possible to rename any file, as this is a virtual filesystem that is permanently and transparently reconstructed out of the content of the Orthanc database.
NB: Starting with Orthanc 1.8.2, ZIP archives can also be added to the
/uploads/ folder. Orthanc will automatically decompress the ZIP
archive and upload any DICOM file it contains.
Server configuration
Options
Three configuration options can be used to configure the WebDAV server:
WebDavEnabledto enable/disable WebDAV.WebDavDeleteAllowedto turn on/off the possibility of deleting DICOM resources using WebDAV. This can be disabled for security reasons.WebDavUploadAllowedto turn on/off the possibility of uploading DICOM resources using WebDAV.
Security
As WebDAV is an application layer above HTTP, you should pay attention
to protect your HTTP server. At the minimum,
you should enable HTTP Basic Authentication (check out configuration
option RegisteredUsers). The client will have to provide her
credentials when mapping the WebDAV share.
If you want to control which user can see which resource, you should
protect your network share by creating access control lists
through a Lua script, through the
advanced authorization plugin, or through
your own plugin
(cf. OrthancPluginRegisterIncomingHttpRequestFilter2()).
The HTTP methods that are used by WebDAV are GET (for read-only
accesses), PUT (for uploads), and DELETE (for deletions). The
access control lists can be focused on these methods.
Finally, it is highly recommended to enable HTTPS encryption, which might need additional configuration on some operating systems (see below for Microsoft Windows 10).
Client configuration
Nautilus on Ubuntu 18.04
It is quite straightforward to use the WebDAV server using Nautilus on Ubuntu:
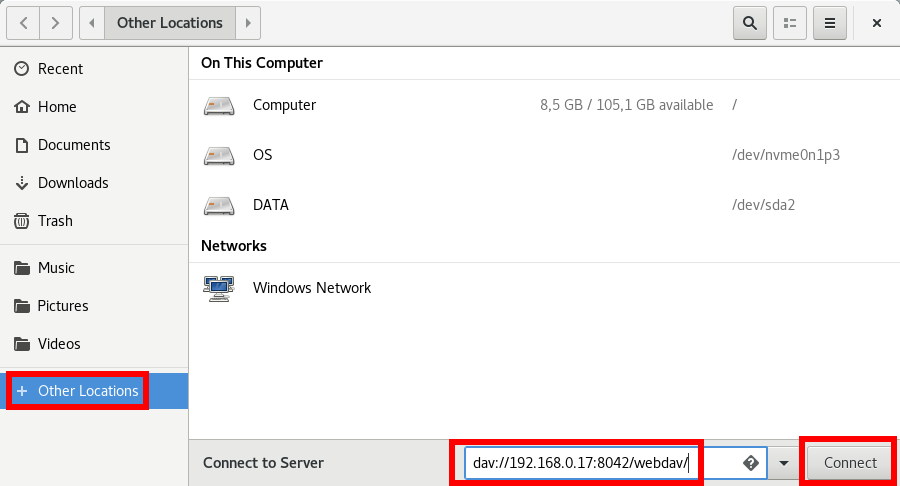
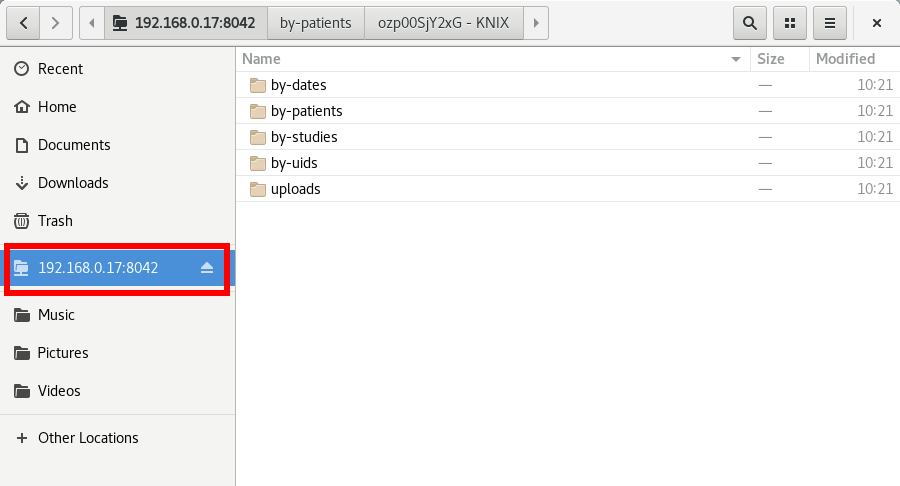
Obviously, adapt the IP address and HTTP port number to your setup. Once the share is connected, it is readily accessible:
Important: If you use HTTPS encryption, which is
recommended for security reasons, replace the prefix dav:// by
davs://.
Microsoft Windows 7
First of all, make sure to adapt the value of the registry key
BasicAuthLevel, as explained below.
Otherwise, you might not be able to connect.
This section illustrates how to use WebDAV on a Microsoft Windows 7 operating system. Obviously, the procedure is very similar for more recent versions of Microsoft Windows, and many tutorials are available on Internet.
WebDAV has a known performance issue on barebone Microsoft Windows 7. To fix this issue, first open the “Internet Properties” configuration panel:
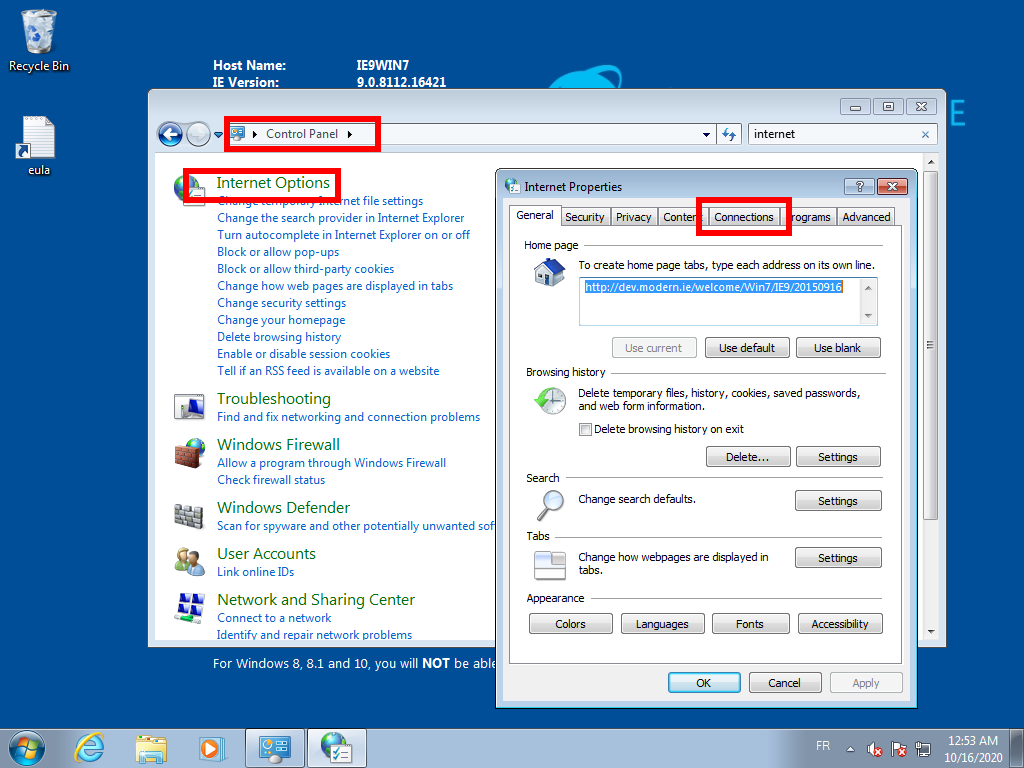
Then simply uncheck the “Automatically detect settings” checkbox in the “LAN settings” panel:

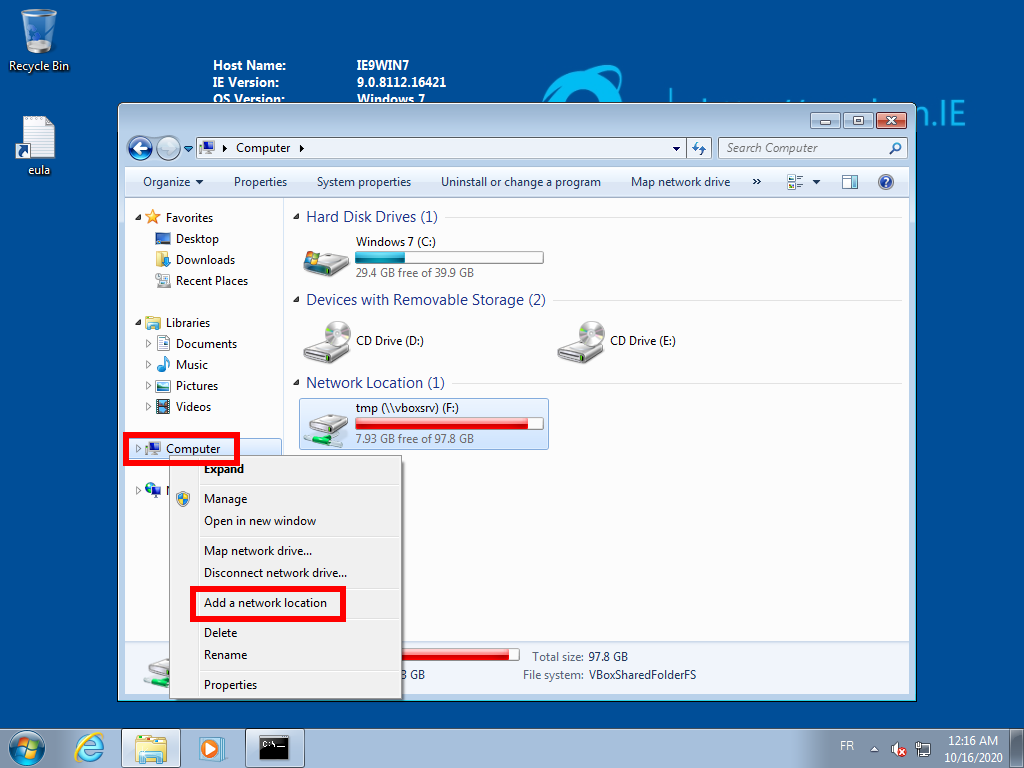
Once this is done, in order to map Orthanc as a network share on Microsoft Windows 7, first open the File Explorer, and right-click on “Computer”:
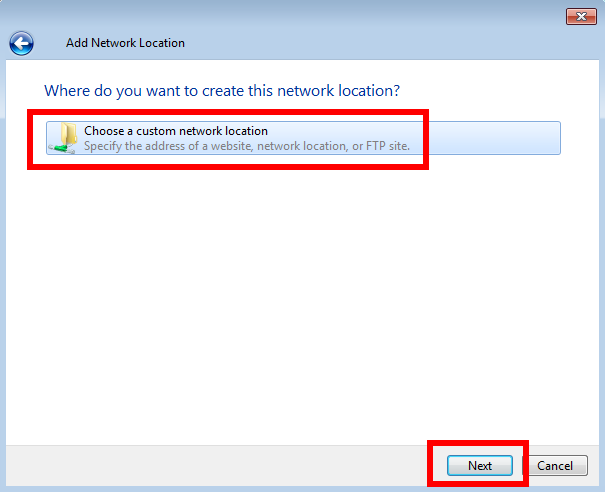
This will open the “Add Network Location Wizard”. Click on “Next” to choose the (only) available option:
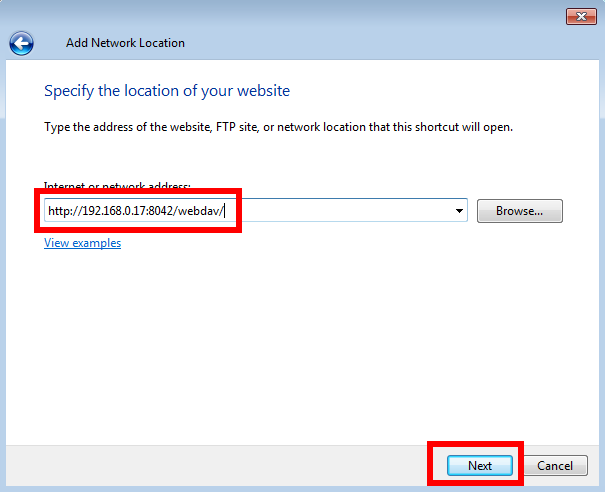
Now enter the IP address and the HTTP port of your Orthanc server, and
don’t forget to add the /webdav/ suffix:
Give a name to your network share:
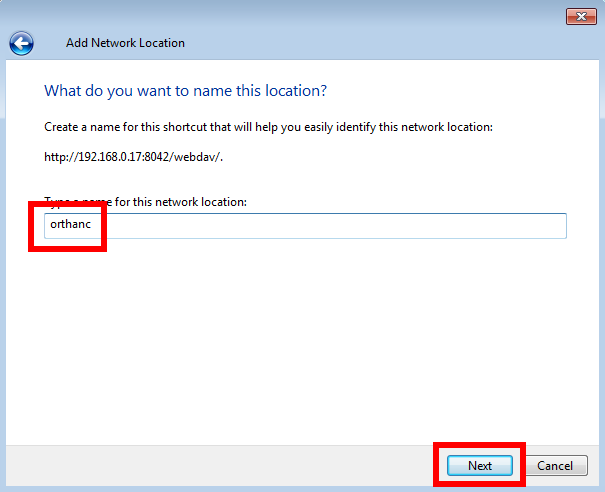
At the “Completing the Add Network Location Wizard”, click on “Finish”. You’ll then be able to use the network share as depicted in the screenshots above.
Important: For some reason, Microsoft Windows 7 sometimes “gets lost” after an upload and cannot access Orthanc anymore. In such situations, you’ll have to delete the network share and repeat the steps above again.
Note that you can find additional information in the thread about WebDAV on the discussion forum.
Secure access using Microsoft Windows 10
First of all, make sure to adapt the value of the registry key
BasicAuthLevel, as explained below.
Depending on your security settings, Microsoft Windows 10 might also impose the use of HTTPS in the Orthanc server. First, you must obviously configure HTTPS security in Orthanc.
In order to connect successfully to Orthanc WebDAV server using basic authentication and SSL with self-signed certificate.
download the
.pemcertificateOpen “Control Panel” → “Manage Computer Certificates”
Right click on “Certificates - Local Computer → Trusted Root Certification Authorities → Certificates” and choose “All Tasks → Import…”
Select the
.pemcertificate (you might need to enforce displaying*.*files in the dialog box, for the.pemextension is not part of the standard certificate extensions)Choose “Place all certifications in the following store: Trusted Root Certification Authorities”
A dialog box should pop up with “The import was successful”
When done, you can test the WebDAV connection :
Right click on the Explorer namespace root (“This PC”, in Windows 10)
Choose “Map Network Drive”
Click the link named “Connect to a Web site that you can use…”
Choose custom network location
Type the WebDAV address like:
https://10.10.10.107:8042/webdav/If all goes well, you should be prompted for the basic auth credentials.
When this is done, the WebDAV location should be mounted at the top of the Explorer namespace (next to the C: drive, etc…). Something to try if the mount fails:
Tips for other operating systems
Microsoft Windows 7, 8.x or 10
If you cannot access WebDAV from Microsoft Windows (with version above
7), as a first step, change the value of the registry key
BasicAuthLevel within the system registry to value 2 (by
default, it comes with value 1 that prevents WebDAV access). Here
are the steps:
Open
regedit.exeOpen the
HKLM\SYSTEM\CurrentControlSet\Services\WebClient\ParameterskeyCreate the
BasicAuthLevelDWORD value if neededSet the
BasicAuthLevelDWORD value to2
This should not be required, but was enabled on the PC that was used to test the mounting procedure. Details here
Note that you can find additional information in the thread about WebDAV on the discussion forum.
Microsoft Windows Server 2012
Install Desktop Experience: Server manager > Add Features > User Interfaces and Infrastructure > Desktop Experience
Start and set to Automatic WebClient Service: Services > WebClient > Properties > Set from Manual to Automatic then start it
Debugging WebDAV
As of release 1.8.0, the WebDAV server of Orthanc has been tested against the following WebDAV clients: Nautilus, davfs2, Microsoft Windows XP, Microsoft Windows 7, and Microsoft Windows 10.
It is obviously impossible for us to test against all the possible platforms. If you encounter an issue using your WebDAV client, you should send us a trace generated by the wsgidav reference server so that we can identify what is the non-respect of Orthanc wrt. the WebDAV standard.
On Ubuntu, here are the commands to generate a useful log:
$ sudo pip install wsgidav cheroot
$ mkdir -p /tmp/webdav/hello
$ echo "foo" > /tmp/webdav/hello/world
$ wsgidav -v -v --auth anonymous --host=0.0.0.0 --port=8042 --root=/tmp/webdav/ | tee /tmp/wsgidav.log
Connect your WebDAV client to http://localhost:8042/, and do some
basic operations (access /hello/world, create a file, create a
folder, and delete a file). Then, stop the wsgidav server and
publish the content of the /tmp/wsgidav.log logfile on the
Orthanc Users discussion group.